nginx需安装nginx-module-vts模块,然后通过nginx-vts-exporter输出监控指标。
nginx-module-vts模块
1 | # 获取nginx-module-vts模块源码 |
配置nginx
- 修改nginx.conf
1 | http { |
- server配置示例
1 | upstream jenkins { |
- 添加到系统服务
/etc/systemd/system/nginx.service:
1 | [Unit] |
1 | ln -s /etc/systemd/system/nginx.service /etc/systemd/system/multi-user.target.wants/ |
- 启动、检查、重新加载
1 | systemctl start nginx |
- 查看status
数据转换
通过nginx-vts-exporter将由nginx-module-vts模块提供的nginx监控数据转换成prometheus能直接使用的格式。
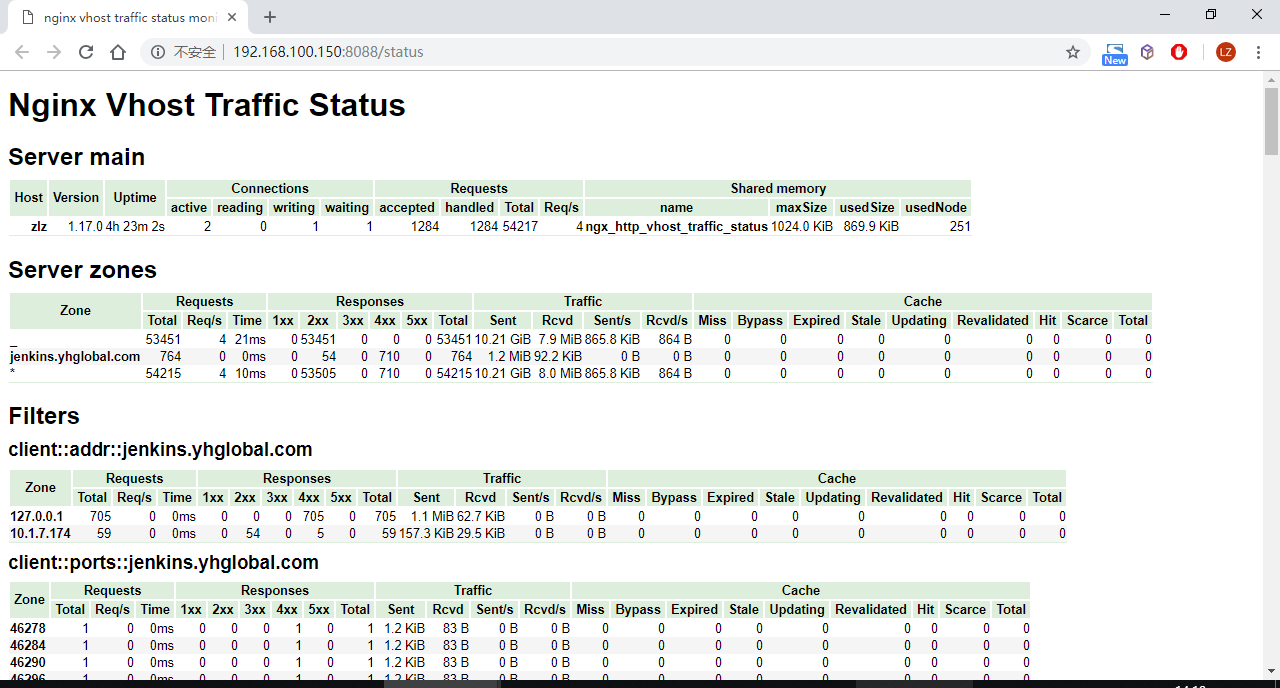
转换前:http://192.168.100.150:8088/status/format/json
转换后:http://192.168.100.150:9913/metrics
1 | wget https://github.com/hnlq715/nginx-vts-exporter/releases/download/v0.10.3/nginx-vts-exporter-0.10.3.linux-amd64.tar.gz |
可通过supervisor保持exporter在后台运行:
1 | [program:nginx_vts_exporter] |
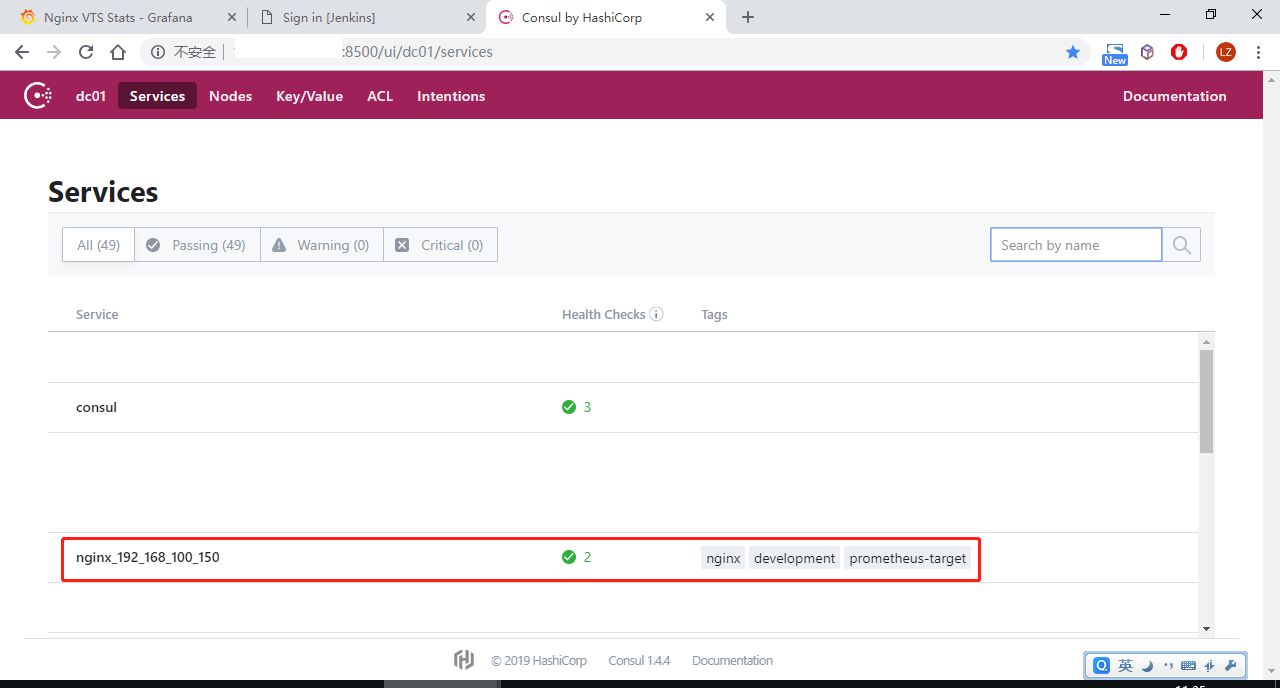
注册到consul
将nginx监控数据接口注册到consul,使prometheus能获取该target。
curl命令参考:
1 | curl http://192.168.100.140:8500/v1/agent/service/register -X PUT -i -H "Content-Type:application/json" -d '{ |
为了统一管控,应按【应用接入说明】记录到配置仓库中。
注册成功后多了一条service记录:
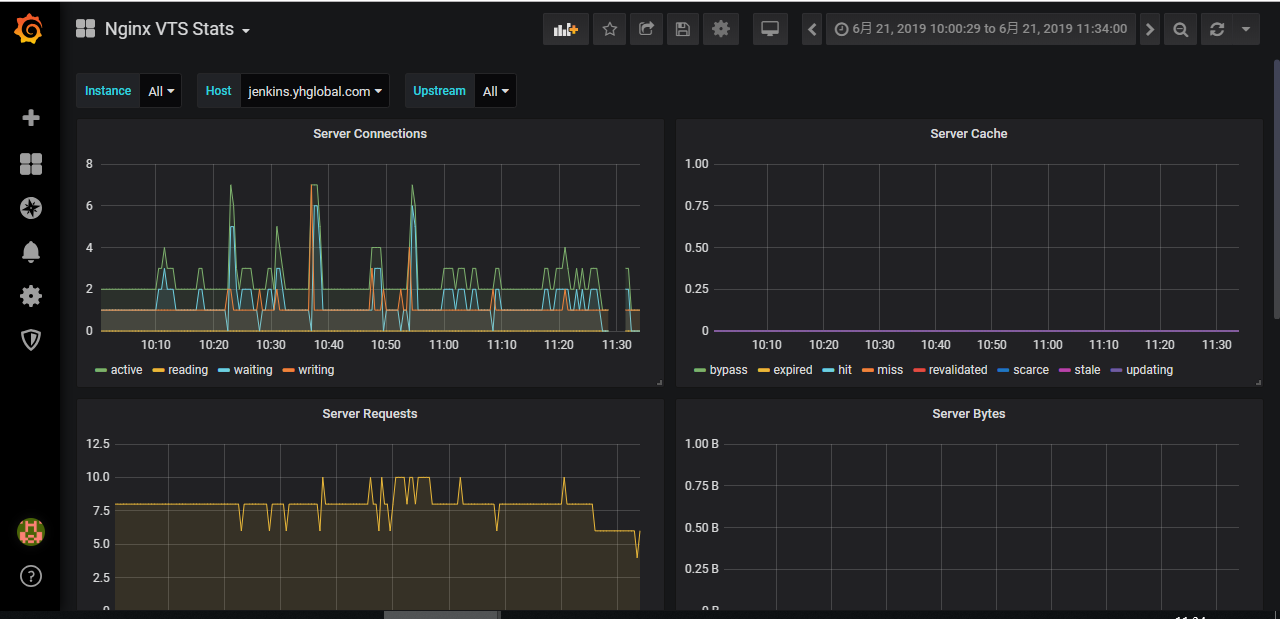
图表