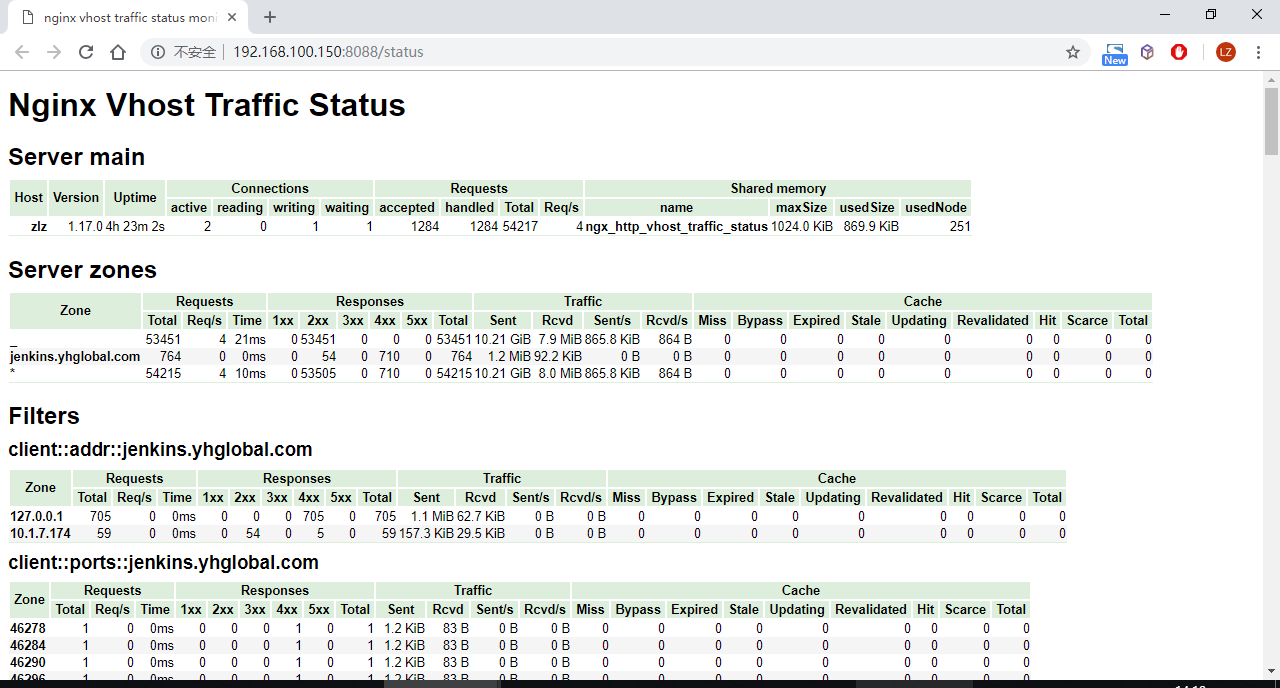
nginx需安装nginx-module-vts模块,然后通过nginx-vts-exporter输出监控指标。
nginx-module-vts模块 1 2 3 4 5 6 7 8 9 10 11 12 13 cd /optgit clone https://github.com/vozlt/nginx-module-vts wget https://nginx.org/download/nginx-1.17.0.tar.gz tar -xf nginx-1.17.0.tar.gz cd nginx-1.17.0./configure --add-module=/opt/nginx-module-vts --prefix=/etc/nginx --sbin-path=/usr/sbin/nginx --conf-path=/etc/nginx/nginx.conf --error-log-path=/var/log /nginx/error.log --http-log-path=/var/log /nginx/access.log --pid-path=/var/run/nginx.pid --lock-path=/var/run/nginx.lock --http-client-body-temp-path=/var/cache/nginx/client_temp --http-proxy-temp-path=/var/cache/nginx/proxy_temp --http-fastcgi-temp-path=/var/cache/nginx/fastcgi_temp --http-uwsgi-temp-path=/var/cache/nginx/uwsgi_temp --http-scgi-temp-path=/var/cache/nginx/scgi_temp --user=nginx --group=nginx --with-http_ssl_module --with-http_realip_module --with-http_addition_module --with-http_sub_module --with-http_dav_module --with-http_flv_module --with-http_mp4_module --with-http_gunzip_module --with-http_gzip_static_module --with-http_random_index_module --with-http_secure_link_module --with-http_stub_status_module --with-http_auth_request_module --with-mail --with-mail_ssl_module --with-file-aio --with-ipv6 --with-cc-opt='-O2 -g -pipe -Wp,-D_FORTIFY_SOURCE=2 -fexceptions -fstack-protector --param=ssp-buffer-size=4 -m64 -mtune=generic' make && make install
配置nginx
1 2 3 4 5 6 7 8 9 10 11 12 http { ... vhost_traffic_status_zone; server { listen 8088; location /status { vhost_traffic_status_display; vhost_traffic_status_display_format html; } } ... }
1 2 3 4 5 6 7 8 9 10 11 12 13 14 15 16 17 18 19 20 21 22 23 24 25 26 27 28 29 30 31 upstream jenkins { server 127.0.0.1:8080; } server { listen 80; server_name jenkins.keep.com; vhost_traffic_status_filter_by_set_key $uri uri::$server_name; vhost_traffic_status_filter_by_set_key $status $server_name; #http code统计 vhost_traffic_status_filter_by_set_key $upstream_addr upstream::backend; #后端转发统计 vhost_traffic_status_filter_by_set_key $remote_port client::ports::$server_name; #请求端口统计 vhost_traffic_status_filter_by_set_key $remote_addr client::addr::$server_name; #请求IP统计 location ~ ^/storage/(.+)/.*$ { set $volume $1; vhost_traffic_status_filter_by_set_key $volume storage::$server_name; } location / { proxy_pass http://jenkins; proxy_redirect default; } }
/etc/systemd/system/nginx.service:
1 2 3 4 5 6 7 8 9 10 11 12 13 14 15 16 17 18 19 20 21 [Unit] Description =The nginx HTTP and reverse proxy serverAfter =network.target remote-fs.target nss-lookup.target[Service] Type =forkingPIDFile =/run/nginx.pidExecStartPre =/usr/bin/rm -f /run/nginx.pidExecStartPre =/usr/sbin/nginx -tExecStart =/usr/sbin/nginxExecReload =/bin/kill -s HUP $MAINPID KillSignal =SIGQUITTimeoutStopSec =5 KillMode =processPrivateTmp =true [Install] WantedBy =multi-user.target
1 ln -s /etc/systemd/system/nginx.service /etc/systemd/system/multi-user.target.wants/
1
2
3
4
5
systemctl start nginx nginx -t nginx -s reload
数据转换 通过nginx-vts-exporter 将由nginx-module-vts模块提供的nginx监控数据转换成prometheus能直接使用的格式。
转换前:http://192.168.100.150:8088/status/format/json
转换后:http://192.168.100.150:9913/metrics
1
2
3
4
5
6
wget https://github.com/hnlq715/nginx-vts-exporter/releases/download/v0.10.3/nginx-vts-exporter-0.10.3.linux-amd64.tar.gz tar -xf nginx-vts-exporter-0.10.3.linux-amd64.tar.gz chown -R nginx:nginx nginx-vts-exporter-0.10.3.linux-amd64 ln -s /srv/nginx-vts-exporter-0.10.3.linux-amd64/nginx-vts-exporter /usr/bin/ nohup nginx-vts-exporter -nginx.scrape_uri=http://localhost:8088/status/format/json
可通过supervisor保持exporter在后台运行:
1
2
3
4
5
6
7
8
[program:nginx_vts_exporter] command =/usr/bin/nginx-vts-exporter -nginx.scrape_uri=http://localhost:8088 /status/format/jsonuser =nginxstartsecs =3 redirect_stderr =true stdout_logfile_maxbytes =50 MBstdout_logfile_backups =3 stdout_logfile =/var/log/nginx_vts_exporter.log
注册到consul 将nginx监控数据接口注册到consul,使prometheus能获取该target。
curl命令参考:
1
2
3
4
5
6
7
8
9
10
11
12
13
14
15
16
17
curl http://192.168.100.140:8500/v1/agent/service/register -X PUT -i -H "Content-Type:application/json" -d '{ "ID": "nginx_192.168.100.150", "Name": "nginx_192_168_100_150", "Tags": ["nginx", "development", "prometheus-target"], "Address": "192.168.100.150", "Port": 9913, "Check": { "DeregisterCriticalServiceAfter": "90m", "HTTP": "http://192.168.100.150:9913/metrics", "Interval": "15s" }, "IsDeleted": false, "Meta": { "version": "1.0" }, "EnableTagOverride": false }'
为了统一管控,应按【应用接入说明】记录到配置仓库中。
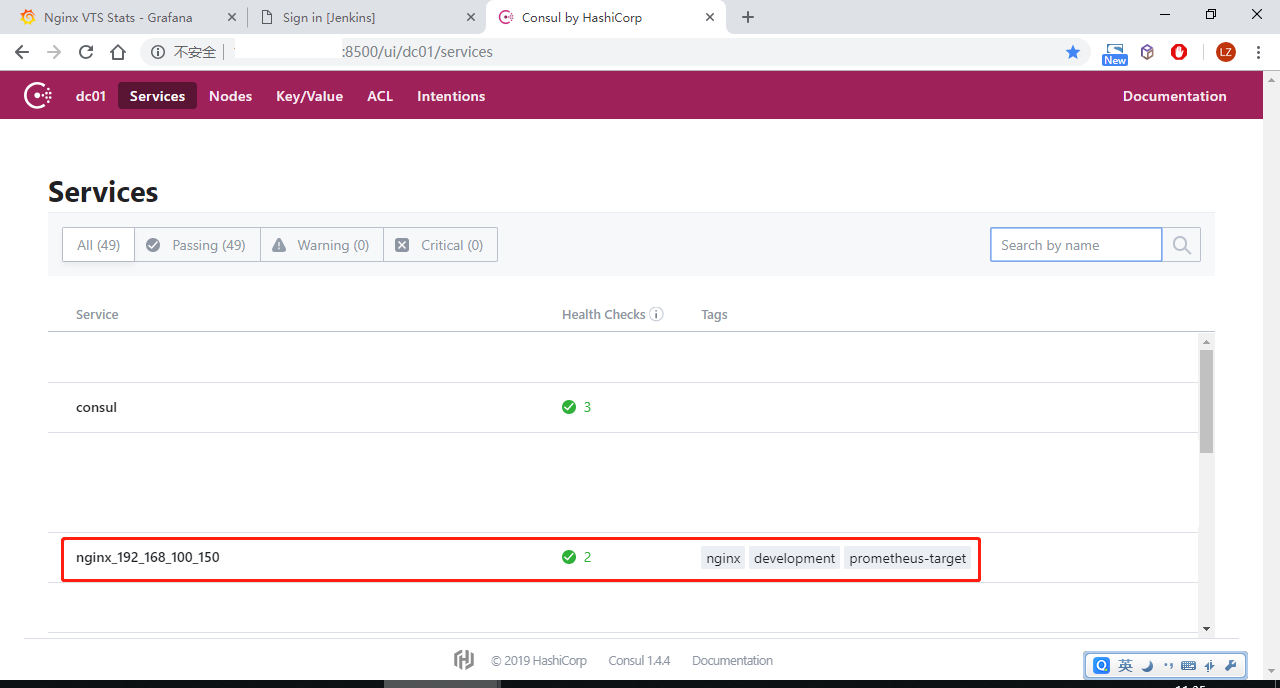
注册成功后多了一条service记录:
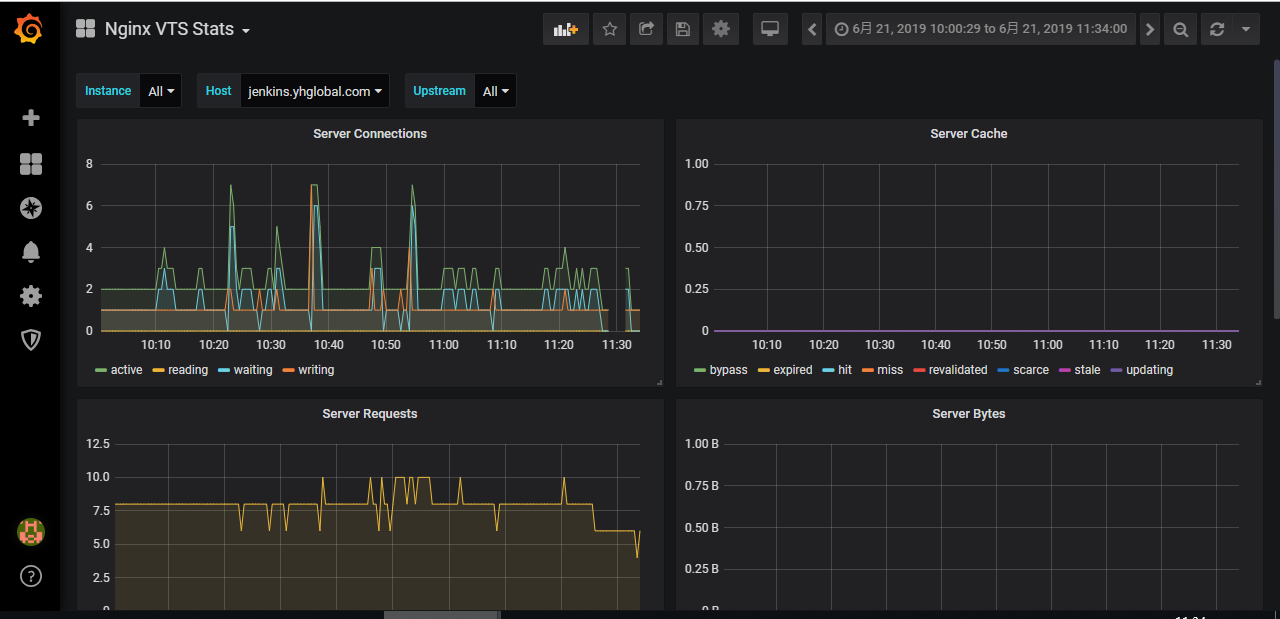
图表


